 |
 |
| The choice of clothing, gear and equipment for bushwalking and trekking is a very personalised process. There is no universal equipment list. Your choices will be influenced by your experience, knowledge, skills, type of trek and budget, to name a few. Therefore, what we have provided on this page is only a guide for the type of clothing, gear and equipment to take on a Larapinta Trail trek. While our focus is on independent hikers planning to do multi-day, extended and End to End treks on the Larapinta Trail, day and overnight hikers, as well as those going on tour based hikes, should find the information on this page useful as well. |
|
 Key Points Key Points |
|
 |
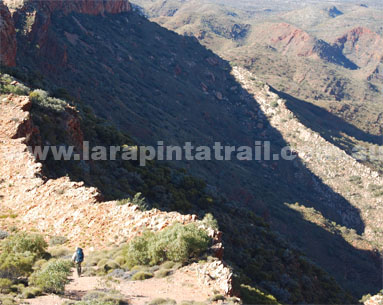
Familiarise yourself with the trail conditions, climate & its sections |
 |
Your boots will get a tough workout, as will your feet. |
 |
Resupply points will dictate how much water and food you carry |
 |
Gas stoves are essential if you want to cook or boil water. No Fire Policy. |
 |
Alice Springs has only one dedicated outdoor travel store - Lone Dingo. |
 |
Have a Fixem Up kit for emergency bush repairs of equipment, boots, tent |
|
|
|
|
| Consider the following factors which will ( and should ) influence what equipment you choose for your trek on the Larapinta Trail |
| Natural Factors: Most Common of the Larapinta Trail |
|
 |
Varying terrain and conditions |
 |
Rough ground. Jagged, sharp and/or loose rocks. Large boulders. |
 |
Lack of drinkable natural water sources i.e. carrying extra water |
 |
Loose gravel and rock ( slippery & unstable terrain) |
 |
Water crossings. Mostly in gorges, especially after rain. It does rain here. |
 |
Heat, sun & high UV exposure |
 |
Hot ground ( i.e. affects glue on boot soles causing sole peel)
|
 |
Freezing temperature and frost during winter |
 |
Heavy dew |
 |
Drizzle and rainfall |
 |
Wind, especially on high ground, where at times it never seems to end |
 |
Sharp spinifex i.e. puncturing gear like air mattresses ( & legs, hands)
|
 |
Dingoes - There has been a significant increase in theft of gear by dingoes |
|
| Some Human Factors ( The Hiker) |
|
 |
Skills, knowledge & experience of the hiker & group |
 |
Level of Individual health and fitness of the hiker & group |
 |
Distance, duration, difficulty of the trek, and time of year. |
 |
Weight & pack capacity needs |
 |
Food & water resupply timetable/points |
 |
Solo trekking constraints, risks & limitations |
 |
Group size ( sharing loads) |
 |
Emergency Evacuation ( i.e. signalling gear etc) |
|
 |
|
 |
 Hiking Boots Hiking Boots |
|
| One of the most important equipment/clothing choices, as well as one of the most common pieces of equipment failure on the Larapinta Trail, is the humble hiking boot. The terrain of the trail will significantly impact your boots ( i.e. scuff, tear, puncture etc) and your feet ( i.e. twisting, gnawing, rubbing, jabbing etc). One of the most common issues for boots on the Larapinta Trail is the sole falling apart ( or peeling off). |
|
|
 |
Choose sturdy & tough footwear |
 |
High cut boots are recommended ( ankle support) |
 |
Sole stitch & glue condition should be 100% |
 |
Must provide excellent support & protection |
 |
Tread must be durable for rocky terrain |
 |
Good traction and grip is essential |
 |
Footwear should be breathable, waterproof |
 |
Outer layers should be tough and durable |
|
|
Danner  | Scarpa | Scarpa  | Teva | Teva  | Hi -Tech | Hi -Tech  |
 |
 Sleeping Mat Sleeping Mat |
|
See the campsite page  for what the most common campsite tent pads variations are like on the Larapinta Trail. Overall, the ground on the Larapinta Trail is hard, rocky, gravelly or uneven, or a combination of all of these. The ground during winter is bitterly cold. Air or closed cell foam mattresses can provide some protection and comfort from these conditions. ( Note: We've seen some hikers use only a tarp or ground sheet as a 'mattress'. The information here is focused on hikers who would like a little more comfort than a tarp to lay on). for what the most common campsite tent pads variations are like on the Larapinta Trail. Overall, the ground on the Larapinta Trail is hard, rocky, gravelly or uneven, or a combination of all of these. The ground during winter is bitterly cold. Air or closed cell foam mattresses can provide some protection and comfort from these conditions. ( Note: We've seen some hikers use only a tarp or ground sheet as a 'mattress'. The information here is focused on hikers who would like a little more comfort than a tarp to lay on). |
|
|
 |
Mattresses's should be durable or well protected |
 |
Lightweight & compactable is ideal |
 |
Good internal mattress insulation is essential |
 |
Air mattress provides a greater level of comfort |
 |
Air mattresses also easily puncture ( i.e. spinifex) |
 |
Fabric surface & underside should be non slip |
 |
Always carry extra puncture repair gear |
|
|
Sea to Summit  | Thermarest | Thermarest  |
 |
 Tent Tent |
|
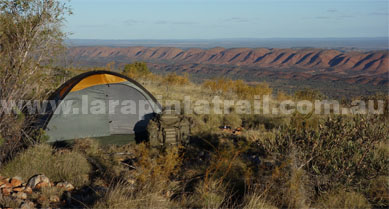
| As with other gear selection, tents are a very individual choice and preference and these choices vary considerably between hikers. There is no best tent option for the Larapinta Trail. Some of the main considerations common on the Larapinta Trail are: Keeping out creepy crawlies ( including venomous snakes, mice, ticks, mosquito's and centipedes); protecting gear from dingo theft ( common occurrence!); keeping out of the wind and dust (particularly on high ground); protection from the cold, and at times, drizzle and rain; privacy and extra comfort. |
|
|
 |
Tents should be lightweight & compactable |
 |
Easy to set up and pack |
 |
Small and unobtrusive when packed away |
 |
Base should be durable and sturdy |
 |
Carry a groundsheet to protect tent base |
 |
Strong, durable lightweight poles essential |
 |
Carry tough lightweight pegs for solid ground |
 |
Good vestibule for protecting gear |
 |
Good vents for air movement inside the tent |
 |
Double skinned tents offer more protection |
|
|
MSR  | Exped | Exped  | Snugpak | Snugpak  | Mountain Designs | Mountain Designs |
 |
 Backpack Backpack |
|
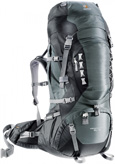
Packs (or backpacks) come in a variety of types, sizes, functionalities and features and are an extremely personal choice. Which pack you choose, how you wear your pack, how you pack it and how you use it will be entirely influenced by your experience, skills/knowledge, physical complexion and capability. Here we will focus on 65-80lt capacity packs specific for independent multi-day  extended extended  and End-to-End walks on the Larapinta Trail. ( Tour based hikes and End-to-End walks on the Larapinta Trail. ( Tour based hikes  will have different considerations) will have different considerations) |
|
 |
 |
70-90litre capacity packs are recommended |
 |
Frame should fit the body well & support the back |
 |
Back padding should be breathable |
 |
Adjustable harnesses's allow personalised fits |
 |
Hip belt design and configuration is important |
 |
Tough, durable outer pack fabric is essential |
 |
Zips should be tough & have weather protection |
 |
Internal pack compartments are very handy |
|
|
Deuter  | Osprey | Osprey  | Tatonka | Tatonka  |
 |
|
|
 |
 |
| The following Equipment Checklist is a general guide only. The checklist is not definitive nor universal. This checklist is for one hiker. Equipment choices will vary considerably between hikers. Quantities of items listed below are not generally shown because this will depend on the type of trek you choose to do on the Larapinta Trail and your personal preferences. |
 |
|
 |
Underwear + spare |
Think about creepy crawlies i.e. ticks |
 |
Pants or Shorts |
. |
 |
Shirt or T-shirt |
Loose shirts provide better sun protection |
 |
Socks + spare |
Hiking socks |
 |
Jacket |
Lightweight microfleece, with hood |
 |
Raincoat |
Lightweight, breathable. It does rain here. |
 |
Boots |
See left for more info. |
 |
Hat |
Essential - wide brim is best |
 |
Beannie |
Lightweight, warm. You'll need it in winter |
 |
Sun glasses |
with UV lenses for greater protection
|
 |
Watch/Time Device |
. |
 |
Gaiters |
Optional. |
 |
Fly Net ( Hat/Head) |
Optional. More Information.  |
 |
Shemarg |
Excellent piece of clothing |
|
 |
Backpack/Pack |
75-85 litres. See left for more info. |
 |
Pack External Cover |
Optional. Waterproof |
 |
Internal Pack Liner |
Waterproof |
 |
Rubbish Bag |
More Information 
|
 |
Snatch Bag |
Optional. Small pocket/bag with key valuables |
 |
Resalable Plastic Bags |
Pack rubbish into, carry in rubbish bag |
 |
Wallet/Purse |
ID, cards, key contact details, insurance etc |
|
 |
Tent + repair kit |
See left for more info. |
 |
Pegs |
Lightweight but tough for hard ground |
 |
Ground Sheet (Footprint) |
To protect base of tent from rough ground |
 |
Sleeping Bag |
. |
 |
Sleeping Bag Liner |
More information  |
 |
Sleeping Mat |
See left from more information |
 |
Bivvie Bag, Gortex |
Optional. More information 
|
 |
Tarp |
Optional. More Information.  |
 |
Pillow |
Optional. Small, inflatable |
|
 |
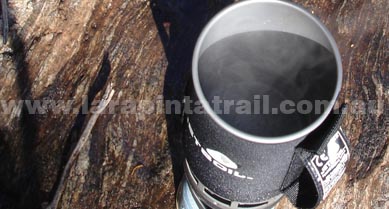
Cooking Pot/Canteen |
More Information  |
 |
Stove |
Stoves Only. No open fires permittedl. |
 |
Fuel |
.Remember: Cant go on planes. Buy locally. |
|
 |
Knife, Spoon, Fork Set |
. |
 |
Food |
See our food page |
 |
Scourer |
. |
 |
Matches |
.
|
 |
Mug |
Optional. |
 |
Plate/Bowl |
Optional |
| Food Resupply Considerations |
 |
Storage Room Key |
See Food Link for more info |
 |
Storage Containers |
To pack resupply food in |
|
 |
Water Bottles ( 1 or 2lt) |
Average carry is 4-6 litres per day |
 |
Hydration Bladder |
2ltre, Camelback type |
 |
Water Treatment |
Water sterilisation tablets or devices |
|
 |
Toilet Paper |
. |
 |
Hand Towel, Sterile |
Anti-bacterial wet wipes |
 |
Hand Sanitiser |
Anti-bacterial liquid |
 |
Trowel/Digging Device |
Some Tips  |
|
 |
PLB |
Essential |
 |
Satphone + recharger |
More Information  |
 |
Mobile Phone + recharger |
 Read more about this. Read more about this. |
 |
Torch + batteries |
. |
 |
Whistle |
Some tips  |
 |
Cyalume Stick |
Take 2. Green work best. |
 |
Signalling Mirror |
(Optional) |
 |
Strobe Light |
(Optional) |
 |
Panel Marker |
(Optional). More information  |
| Sustainability - Keeps thing going |
|
 |
Spare Batteries |
For torch, GPS, cameras etc
|
 |
Cash |
Camp fees, other.. More Information  |
 |
Portable Solar Chargers |
(Optional) |
|
 |
Maps |
Buy  or download or download  |
 |
Map Covers/Pockets |
. |
 |
Compass |
(Optional) |
 |
GPS |
(Optional) |
 |
Trek Plan |
See Emergency Page  for more info for more info |
|
 |
First Aid Kit |
|
 |
Medical Warning Sheet |
More Information  |
 |
Personal Protection Kit |
Insect Repellent, Sunscreen, Lip Balm |
 |
Personal Maintenance Kit |
More Information  |
 |
Multi Tool |
i.e. Leatherman, Swiss Army Knife |
 |
Fixem Kits |
More Information  |
 |
Soap |
Biodegrable |
|
 |
Camera + Batteries |
. |
 |
Memory Cards |
. |
 |
Video Camera |
(Optional) |
 |
Tripod, adjustable |
(Optional). Wrap arounds |
 |
Walking Poles |
(Optional) |
 |
|
